We use cookies, which are small text files, to improve your experience on our website and to show you personalized content. You can allow all or manage them individually.


Set-up
We have compiled step-by-step guides on setting up SXFI AMP with different devices.
Before setting up on your device, make sure that your Super X-Fi profile has been loaded into the SXFI AMP by following this guide:
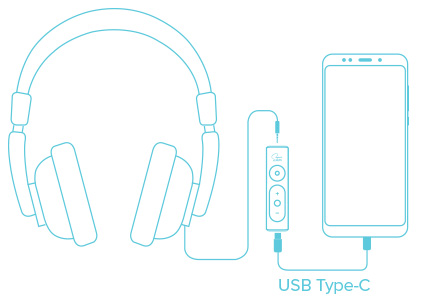
Step 1: Connect SXFI AMP with your Android Phone
Open the SXFI App.
Connect your Android phone to the SXFI AMP with the USB C-to-C cable1 provided.
Step 2: Connect SXFI AMP with your headphones
Connect your preferred headphones2 to the SXFI AMP, select the headphone profile via the ‘Headphone Selection' tab in the SXFI app.
You can also redo your Super X-Fi profile by tapping on the ‘Personalize' menu tab in the SXFI App and go through the 3-step set-up once more.
1 For Android phones with a USB Micro-B connector, use a USB Micro-B OTG adapter and the provided USB C-to-C cable to connect. Make sure that the adapter is marked “OTG” as the phone needs the signaling from this type of adapter to switch itself into USB host mode.
2 If you are using a headphone that is not listed, try the “Unknown In-Ear/Headphone” first, and if that does not work as well, you will have to try each headphone selection in the list to find one that works better.
This list will be expanded regularly to give you greater choice so less effort is needed.